Sunday, March 31, 2019

Positive Impacts Your Hobby has on Your Life

Elise Morgan was kind enough to contact me and volunteer to write a blog post about the positive impact of a great hobby on your life!  This is a topic I'm really passionate about, from the wonderful friends I've made machine knitting to the fascination of it that takes my mind off, well, anything else that might be bothering me.

Here's Elise's take on the subject:\

Positive Impacts Your Hobby has on Your Life
 
by Elise Morgan


It’s easy to get feel like you’re stuck in a rut and just going through the motions of daily life, with little-to-no changes in the sequence. However, having a hobby that we truly enjoy participating in brings us joy and enriches our lives, while giving us a reason to “take a break” from our day-to-day normalcies. Luckily, there are so many different hobbies out there, and with each one comes a unique set of skills.

There are so many reasons that we should all have at least one hobby. Below are some of the most important advantages: 

1.     Social Outlet 

Many hobbies allow for us to find a social outlet and can even provide a degree of social support that we are needing. While some hobbies may seem like solitary endeavors, many can get us involved in our communities and allow for us to meet with people that we would not normally meet. These social connections have been found to be a key component of our happiness and ties to the belief of having a “meaningful life”.  

2.     Reduce Stress 

Forget about the stressful situations by getting caught up in your hobby – this way you can refocus your mind on something that you truly enjoy.

If your hobby involves physical activity, it can help to create chemical changes in your body that reduce stress and leave you feeling energized.  

Nonphysical hobbies have benefits as well - taking a break from the anxiety and exertion of daily life by participating in your hobby intermittently can help to rejuvenate the mind and provide more creativity and problem-solving afterwards.  

3.     Better Sleep 

In today’s technical era, it’s hard to resist the urge to look at your phone, TV, or computer before going to bed. If you have ever done this before, you probably know that it’s a lot more difficult to fall asleep after doing so.  

Instead, finding a relaxing hobby such as knitting or reading can help you wind-down for bed by slowing your heart rate and halting that wandering mind at night. Pair a good soothing hobby with a lavender candle and an ultra-comfortable bed to help you get the sleep that you’ve been missing out on lately – we all know it’s much-needed. 

4.     Boost Your Career 

It may seem counterintuitive that something other than work will help to boost your performance in your career, but you better start believing it! Having a hobby helps you learn how to handle situations that require creativity and concentration, and even shows your employers that you have the drive to do something with your time outside of work. 

In addition to boosting your performance, having a career can also help to reduce feelings of burnout. This is because you are able to take your mind off of work and focus on something completely different for the rest of your night, letting you feel refreshed and ready to focus at the office the following day.

5.     Gain Confidence 

It’s a great feeling when you know that you have talents outside of your work-life. Sure, you can be good at your job, but trying out different hobbies and discovering what other talents you have can give you an extra confidence boost.


About Elise Morgan:  Elise is a mother of two wonderful children and a freelance writer located in the mountains of North Carolina. She has recently found her passion writing about all things parenthood, hobbying, and home life. In her free time, Elise enjoys practicing yoga, trying out new recipes, and of course – knitting!


Tuesday, March 5, 2019

A Little Project

My friend Barbara had a spare Brother 930 that she wanted to sell, and she didn't want a whole lot of money for it.  It had previously lived at her friend's house and wasn't used much at all.  The machine looks practically new!

This was a machine in great shape, but it needed some of the usual things.

Our club heard from a lady from the prominent local university's theater department who wanted to buy a knitting machine and make it available for the students to use, as well as herself, in costuming.  As a group, my knitting buddies and I were pretty excited about this, because we are not aware of any machine knitting going on at that school.

So, Barbara brought the machine over.  Of course, it needed a sponge bar!  Once that was replaced, we set it up and tested it.  It was miss-patterning on both ends of the needle bed, and the center carriage buttons were stuck.

My husband came to the rescue once again - he took the carriage apart enough to thoroughly lubricate everything, and instantly, no stuck buttons and no miss-patterning!

Barbara also had a KR850 ribbing attachment, and the university wanted that, as well.  It needed some parts, and I inventoried it against the ribber manual and ordered items.  I ordered a few things for myself, as well.
This arrived yesterday, all carefully and closely fitted into a rather small Priority Mail shipping box. On the right, wrapped in honeycomb-looking shelf liner, are four claw weights I ordered at the same time.  

Barbara and I feel really good about the students having all the parts they need to have a great machine.  

This little story has some good lessons if you have to rehab an older machine:
  • When a machine miss-patterns (selects the wrong needles in pattern), it seems to nearly always be the carriage.  John has fixed quite a few of these, and only one was something in the machine.  
  • When you test a machine to see if it selects needles correctly, put all the needles in work and check out the entire bed.  I really don't know why, but this carriage only miss-patterned on the ends, and if we'd just tried out needles in the middle, we'd have had no idea there was a problem.
  • Oil, oil, and oil!  Each moving part on the bottom of the carriage needs to move fast!  Flippers should "flip!" rather than move lazily back into position.  The carriage zips across the needles very quickly, and a slow flipper doesn't have enough time to put the needle where it should go.
  • Most used machines need a new sponge bar.  Always check the sponge bar!  It should hold the needles down against the bed.  It should have some height left in it, not be crushed down.  Look at the ends where it wasn't against needles, and compare that height to how tall it is where the needles are.
  • If you are buying a knitting machine, don't be embarrassed to pull out the manual and inventory all the small parts.  Those little things are expensive, and if you're picking up an unusual brand or an older machine, spare parts can be quite rare.  However, don't assume that it will not be possible to get parts.  I have found that most parts for the punch card and electronic era Japanese machines are available.
  • If you find yourself with an unusable knitting machine, maybe one that was dropped, has a badly warped bed, or some other major fault, please part it out rather than discard it.  We machine knitters love these old machines, and you can sell your good parts on eBay or give them to a dealer, knit club, or repair person.    

Monday, March 4, 2019

New Video - Loose Loops for Binding Off

A practical little tip for March.  It's cold here - great knitting weather!


I've discovered that each machine is different for this - some work okay with a knitting tool, some with a chopstick, and for some, I just eyeball it and adjust it to make it more even right before I do the bind-off.  It's a timesaver, for certain, to have loose loops and go right across binding off quickly.

Sneak Peek:  In a few days, I will have a circular sock machine knitting book and DVD ready to sell!  The video is in duplication right now.  I am an avid CSM user, and just hope my approach to sock making will be helpful to others.

And, I'm madly knitting up patterns for a shawl and wrap book.  It's not as close to ready, but hey, it's ready when it's ready...  I had retired, but my replacement at the Boy Scouts resigned, so I'm helping out part-time until the audit is finished. I'm totally enjoying it, but it'll slow down the shawl book a bit.

Tuesday, February 19, 2019

Inspiration at Knitting Up a Storm

Check out these beautiful felted slippers!

http://knitting-up-a-storm.blogspot.com/2019/01/fo-french-press-slippers.html?utm_source=feedburner&utm_medium=feed&utm_campaign=Feed%3A+blogspot%2FDVfvF+%28...Knitting+Up+A+Storm%29

Saturday, February 16, 2019

Connie's Warm Idea & Other Variations on the No-Sew Lined Slipper

Connie has come up with a very clever modification to my sew-as-you-go lined slipper from the Footnotes book.  She adds a cuff, which is doubled like the rest of the slipper!  Connie says she lives in Michigan and needed to make a warmer slipper.

She was kind enough to send me a photo and give permission to share this great idea on my blog.


I asked her how she does it, and she said that after knitting the lining, she added 40 rows and then went back to the rest of the pattern.  It does take some sewing, of course, but it's minimal.

This Sew As You Go Lined Slipper is probably my most popular slipper pattern.  It's double, and when you finish knitting it, the only sewing you have to do is hide the ends.  With Connie's modification, the only sewing you'll need to do is sew the cuff closed and hide the ends! 

The Footnotes book has the slipper in 12 sizes for standard gauge, mid-gauge, and bulky machines.  Here's a picture of the slippers without the cuffs.  I make the slippers in all sorts of yarn, since I have all those gauges worked out.

When you have a pattern for a small project like this, and lots of gauge options, it makes a great scrappy project.  Connie used two colors on her cuffed slipper, and I used at least two colors (an outside and a lining color on the ones in the photo.  Consider, then, my brown and green scrappy variation from the Footnotes book:

To get this look, do your color changes at the narrowest part of the heel and toe of the outer slipper.

If, like me, you knit a lot of woolen socks, you end up with a bunch of small balls of leftover sock yarn.  Sock yarn works very well for the standard gauge version.

Finally, one more slipper idea.  For a luxurious slipper, you need only a small amount of a luxurious yarn, something super soft, for instance, baby alpaca, to line the slipper.


Sunday, February 3, 2019

New Video Today - Tuck Mosaic

For February, the new video is about tuck mosaic, also called two color tuck stitch.  


I had a great time working with this particular tuck mosaic pattern.  The strong graphic design is quite striking, especially if you use a self-striping yarn with a solid color.

How about a placemat?


Tuck Mosaic Placemat

By Diana Sullivan


This will make a placemat.  You will find the stitch creates a relatively flat fabric with little edge roll, a pretty side edge, a lot of thickness and warmth, and a wide piece compared to slip mosaic.  It’s a very suitable fabric for garments, blankets, and household items.

Note that mosaic stitches, or two-color tuck and slip, have a different look than the diagram.  Here’s the diagram for this stitch:


Placemat:

Machine:  Brother 270

Yarn:  I used Caron Cakes along with I Love this Yarn in the white, but I want to try this with scraps or yarn that changes color more often.

Program the machine for pattern 146.  No variation keys.  Turn the center black piece in each of the pink cams on the bottom of the carriage so that end needles will ALWAYS select.

Needle arrangement:  Left 20 to right 21.  Set tension to #6.

Cast on with waste yarn and knit a few rows, then a row of ravel cord.  Change to darker yarn.  Knit 3 rows.  Turn tension dial up to #10 and knit a row.  Turn tension back to 6.  Knit 3 rows.  Pick up hem.

Turn the row counter to 000.  Turn on KC.

Thread with white.  Knit 1 row.  Needles will select.  Put in both tuck buttons.  Knit 2 rows.

Take out white yarn and “park” it under the end of the needle bed.  Put in color yarn.  Knit 2 rows.

Continue to knit 2 rows white, then 2 rows colored yarn, until row counter 84.  You should end with 2 rows white.

Turn off patterning.  Knit 1 more row white.  Thread colored yarn, knit 3 rows.  Turn tension up to 10, knit 1 row.  Turn tension back to 6, and knit 3 rows. 

Knit several rows of waste yarn in a contrasting color.  Cut yarn, leaving a long tail for sewing.  Sew the hem shut with a whip stitch through the bottom and top loops of each hem stitch.

Block lightly.

Edit:  I've added the chart, in case you don't have a copy of that Stitch World book.


Wednesday, January 16, 2019

Making My Own "Cake"

I've got a project for which I want a slow-changing, tweedy colored yarn.


I found some who-knows-what-it-is white slubbed yarn, and I'm using a twisting yarn winder to ply it with sock yarn scraps.  I knit a lot of socks, and have a lot of partial balls, since it normally comes in 50 or 100-gram balls.  Most of my leftover sock yarn is variegated or self-striping.  I'm putting maybe 100-150 cranks on the yarn twister in of one ball, then tying on another ball and continuing.

I had maybe ten balls that had some blue in them, and that's what I'm using.

I wasn't so sure I'd like this, but I knitted a sample, and am pleased.

Ah, back to the winding!  Good thing I'm listening to an interesting book.


Monday, January 14, 2019

Working On My Knitting Studio

When our younger son left for college, I took over his bedroom and made a knitting room.  I foolishly thought all my knitting things would be in one room, but no, it's still all over the house. 

One of my first goals as a new retiree is to work on the knitting room and make it into a studio where I will really enjoy working.  It was probably in the worst possible condition after last year. I was overwhelmed at work, helping hire and train a new person, while very busy.  I also traveled and taught five seminars.  It was a wonderful year, but I didn't even unpack right away after some of the trips, and plenty of times, I just tossed bags and boxes into the knitting room.

I've been working on it diligently every day, and progress is happening!  I still have a big list of things to do, but here's what I've done so far.

For starters, I put together some wire cubbies for yarn.  These things are simply banged together using plastic connectors and a rubber-tipped hammer.  They're about one foot square, and I put them up along most of the longest wall in the room.  I started with 10 units long by 5 units tall, but John looked at it and suggested I go one unit higher, so now I have a 10x6 array.


I put bulky yarn in the left end of the rack, then mid-gauge yarn in the middle, and standard gauge yarn is on the right end.  I am embarrassed to say that this isn't all of my yarn. There are also two cone trees in my bedroom and some boxes downstairs.  Friends have generously given me yarn, and yarn has been included with machines I purchased.  It's time to do another yarn destash.  I went through a period where I gave away ridiculous amounts of yarn.  It even sold it for $1 a cone at a garage sale, and a customer told me I was crazy to sell it that cheap.  Well, my friends didn't want any more yarn, my house was groaning with it, and it had to go! 

It took me a while to learn that I don't love collecting yarn and machines.  It's knitting, designing knits, and teaching that gives me joy.

One task I didn't realize would be fun was putting yarn and tools into the rack.  I had forgotten some of the yarn I had.  Having pretty stuff on shelves at eye level makes me want to knit - big time! 

I had read about a financial challenge a while back that suggested one buy nothing in January.  Give the credit card a post-holiday rest and "shop" in your home, said the article.  I wasn't doing it deliberately, but this project had me shopping in my own home, and there were some great finds.

Most of the rest of these photos are things that have been in the room for ages; it's my attempt to organize the miscellany that comes with a passion for machine knitting.  Since I like to see how things can be stored, maybe you'll pick up an idea or two from my storage.


Starting at the door and going clockwise around the room, and with all the machines uncovered so you can see how I work, here's some my functional but messy room.  On the back of the door I have a clear shoe bag.  I've had this for ages and find it works great for keeping and being able to quickly find small KM items.

After you walk in, there's a small closet with bi-fold doors, and in front of that there's a little wooden stand with my electric cone winder and my jumbo yarn winder.  These need to be out all the time.  I very seldom use a small winder anymore!  I don't believe in knitting without rewinding the yarn.  There's a trash can right there, between the winders and the mid-gauge Studio 860.  It's so handy to have a trash can by each machine.

This is my Studio 860, which is electronic mid-gauge. There are cups and trays of tools next to it, and on the floor under the winders is a cardboard box filled with more mid-gauge tools.  The machines set up in this room are my workhorses.  Sometimes I teach on other machines, and those machines are put away elsewhere.

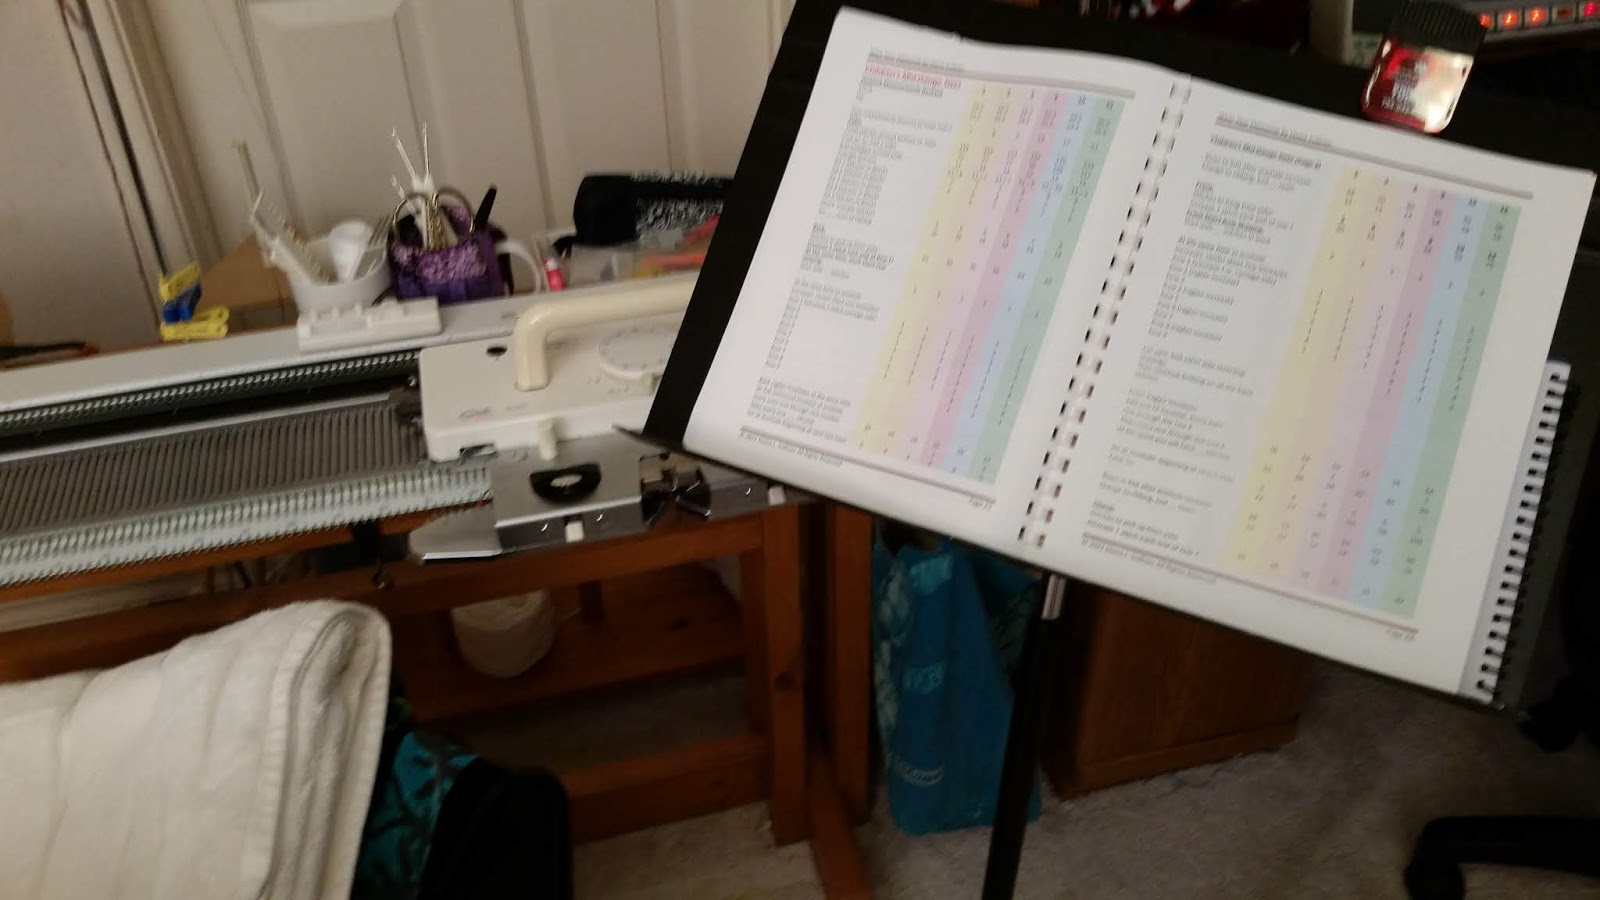
To the right of the mid-gauge is a sturdy music stand.  I've tried different ways of keeping the current pattern and notes handy, for instance, clipping them to the yarn mast, but this works best for me.  A music stand is one more thing cluttering the room, but it has lots of room.  In addition to my pattern, I have a spiral notebook, a pen, and another pattern or two I'm thinking about working up.

If I'm working and get an idea or think of a task I don't want to forget, I'll write it down right away with that handy paper and pen. 

I have a desk in the corner of the room.  This was my 35-year-old son's desk way back in high school.  Although it's old and battered, it is very functional for my needs. It holds my desktop computer and has lots of cubbies to stash things.  It also has a pull-out on the right side that provides extra surface area when I have a desk project.  I use this area to edit video, do bookkeeping, figure out patterns, and keep oddball things like DAK cables or my camera bag handy.

This is a special computer, configured for editing video, and I am very grateful for it, because it saves me hours of time on each video project.  I needed a special video card and lots of memory (we went with 36 GB) to handle high-definition video files.  I'm thrifty, but my husband has tried to teach me how important it is to have the right tool for the job.  This is a great example of how much having the right tool pays off.  It's due for a tune-up, a new hard drive and some software installation.

I have two rolling office chairs I move around the room.  I prefer the adjustable office chairs, because they're padded and I'll move them up and down just to change my body position as I work. 

Next, on the west wall, in front of the window, is my bulky machine (Brother 270) that you see so often in videos.  The day I took the photo was rainy and gray, but this bay window on the second floor looks out on the front lawn.  I enjoy having it open for the extra light.  It's not good for the machines to be exposed to sunlight, or dust.  I have colorful beach towels to keep them covered, but these pix are with everybody naked. 

This 270 is the machine I usually go to first if I'm playing around with swatches, trying out ideas and solving problems.  I purchased three sets of these cheap plastic drawers about 20 year ago, and they're still just fine.  This one is on wheels and filled with bulky tools.  I have ribber covers in place all the time unless I'm using the ribber.  I will also remove the ribber entirely if my project is on the main bed and I need better access.  This one's on a tilt stand, so I can easily go from main bed work to ribber work and back again.

And, here's the standard gauge machine, a Brother 965i.   It is mounted on a Brother motor drive.  I currently have an old color changer on it, because I was doing some Brioche ribbing.  I have wires and extension cords in a pile on the floor.  When we have lightning storms, I always crawl under here and unplug the power strip, which is used for this machine, the camera, the light, and the motor.  Almost everything in the room is on three power strips, which facilitates unplugging at the very first rumble.

With the extension cords, I can easily move the camera and work light all over the room.  The plastic drawers are filled with standard gauge tools and weights, and then on top is a carrying tote overflowing with ribber items. 

Here's the far right side of the room, with new yarn cubbies in the background and an oddball item in the foreground.  This is the light I use when I'm filming.  We discovered that the more light I have, the clearer I can get the video focus.  My husband gave me this garage work light stand.  It used to hold an incredibly bright halogen light, which was hot and an energy pig.  I'd get cooked working in here.  Despite the heat, I became utterly sold on having lots of light in the room as I knit.  When the LED work lights became common, we put one of those here instead.  It's just as bright and not as hot.  In addition to the ceiling light fixture, there's a halogen floor lamp by the Passap and a clip-on desk lamp. 

That's it for the north wall, and turning to the east wall, which is a short wall, I have my beloved Passap E6000.  In the corner left of the E6 is a large capped PVC pipe, which holds all my sponge bars, both new and worn out.  I prefer to purchase new sponge bars, but sometimes you need a size that you can't find, and you can put new foam rubber into an old sponge bar frame.

 There's also a cardboard box, which is filled with ribber combs.  I really don't have a smart way to store ribber combs.  I tried hanging them Command brand hooks, but they're a bit heavy for the hooks and tend to hit the floor.  Also, the combs are also unbalanced and hang crookedly if you use the weight holes.  I suppose the solution would be to drill a hole in a spot that balances, polish the hole's rough edges, and then pound nails in the wall, but I hate to drill a new hole in any of my combs.  Anybody got a great idea for storing ribber combs?

Friday, January 11, 2019

I've been knitting lately...

I have been taking a sample Entrelac sweater with me to seminars that doesn't fit me anymore (I made it when I was bigger).  After all this time, I finally got around to making a new one to fit me!

This is from my Wear Your Diamonds book, which has Entrelac yoke sweaters for men, women, and children for mid-gauge and bulky machines. 

As we say in Texas, this is not my first rodeo!  I knitted quite a few of these in the course of creating the book and the video, but surprise - I hadn't knitted one of these in several years, and I had to reread the instructions carefully.

This is a round yoke sweater, which is a variation on a basic raglan.  I love the look of round yoke sweaters, and these have a strong graphic design that I especially like with the contrasting colors and the changing block sizes.  This yarn is Brush Strokes, a soft acrylic with a little alpaca.

You start with the yoke, using waste yarn at the bottom, then making triangles for the bottom of the yoke, then the rounds of different sized blocks. 

The big problem with having a sweater that is part Entrelac and part stockinette stitch is that the Entrelac is very, very wide compared to the stockinette. I came up with a way to greatly reduce the number of stitches for the yoke compared to the sweater, which is done in the setup triangles.

When the yoke is done, it's rehung upside-down on the machine for the body pieces.  This photo shows the short-rowing which makes the body fit properly with the round yoke. 

The front, back, and two sleeves are all different, because to have a good fit, the front neckline must be lower than the back neckline.  The whole yoke is placed lower on the front than the back, that is, the body is modified to make the neckline sit lower. I marked the inside center back of the yoke with a few stitches of the medium gray yarn, so I can easily find the right way to pull on the sweater. 

Today I finished assembling the sweater.  I found this fabric rather difficult to sew, since the yarn has hairy strands that make it hard to see individual stitches.  I put in and removed the first seam a couple times, and then got a very bright light to shine right in my lap, which made it much easier to see the stitches.


The color shows up best on the photos of the sweater hanging on a door.  In the close-up, the flash washed out the color a bit, but I'm including it so you can see the texture.  I didn't block the sweater at all, preferring to leave the three dimensional texture of the Entrelac diamonds. 


Sunday, January 6, 2019

Tuesday, January 1, 2019

Things to Do On New Years's Day

There are lots of superstitions about New Year's Day.  Here in the South, we're supposed to eat a "mess of black-eyed peas" for good luck and prosperity during the new year.   Some the other traditions and ideas I found on a web search:
  • Other foods are supposed to be lucky - lentils and pork, for instance.  Lentils are round like coins.  Pigs move forward as they root, and we want to move forward, don't we?
  • We're supposed to stock up the pantry!  You can't start out with bare cupboards, or the year will continue in that way.
  • Don't let any of your stuff leave the house; otherwise, this will be a year when things leave the house, and you become poor.  True believers don't even carry out the trash! 
  • Don't break anything today, or pay out any money, or cry.  Again, you're avoiding setting a negative pattern for the year.
  • First foot - the first person setting foot in your home is going to set a pattern for the year, so it's best if he's tall and handsome. 
  • Polar bear plunge - jumping into cold water is a New Year's tradition in several colder countries.  I have NO IDEA why what's good luck.  Can anyone enlighten me?
  • Set goals and make resolutions to set the tone for the year.  After all, a new year is a new start!
  • Turn the hangers in your closet the wrong way.  As you use your clothing during the year, you'll put it back in the normal way, and next New Year's day, you any easily identify anything you haven't used all year so you can clean out your closet.
All right, y'all, I am giving MY plans for great New Year's Day:
  • This is the FIRST DAY OF MY RETIREMENT!  I am celebrating a new time in my life and new adventures I know God will bring.  I'll start by spending time with the Lord. 
  • I'll follow my food plan.  Many of y'all don't remember me when I was fat, but five years ago, I lost a LOT of weight, and I'm sticking to the plan!
  • I am going to pack some boxes for charity, at least one or two, because I need stuff to go OUT of my house.  I want to set my brain on culling things we don't use. 
  • I'll knit for a while, to establish that pattern (and because I love to do it).
  • I'm going in my knitting room and doing the little TLC routine on all my knitting machines that are set up.  (The video is below).  A little cleaning and oiling, a little love, and these wonderful old machines will give another year of excellent service!

Tuesday, December 25, 2018

Merry Christmas!

"For to us a child is born, to us a son is given, and the government will be on his shoulders. And he will be called Wonderful Counselor, Mighty God, Everlasting Father, Prince of Peace."


How beautiful is this season when we remember how God came to live among us!


I am very, very grateful for those of you who read this blog, share my machine knitting hobby, and especially the knitters I have gotten to meet in person. I wish you every blessing this Christmas!  -Diana


Monday, December 3, 2018

Saturday, September 22, 2018

New Video for September

Here's a fun little baby project:


Like it?  It's from my Goldilocks book and DVD set, which is chock-full of easy, gift projects.  When I wrote the book, it was as a "progressive project" teaching tool.  It starts with the really basic ones and moves to the more difficult. 

You could start as a beginner machine knitter with this book, work the projects in order, and by the end of the book, you're making a real, shaped cardigan sweater with buttonholes.  It comes with 4 hours of video that is all about how each technique is performed.

The Goldilocks Challenge is available at www.dianaknit.com

Saturday, September 15, 2018

Upcoming Seminar at Prince Edward Island, Canada

I've been looking forward to this for ages - my first seminar in Canada!

Here is some information from the Glen Valley Knits website. 

2018 MARITIME MACHINE KNITTERS - SEMINAR
Hosted by - THE ISLAND (P.E.I.) KNITTERS CLUB


WHERE
The Island Knitters Club will be hosting the 2018 Maritime Machine Knitters Seminar at the  RODD ROYALTY INN, West Royalty, Trans Canada Highway,14 Capital Drive,  Charlottetown, P.E.I. (902) 894-8566 or toll free  # 1 800 565-7633  www.roddroyalty.com  Guest Room Rate $159.00., which includes a delicious breakfast of scrambled eggs,sausage,waffle station,toast,muffins,hot/cold cereal,yogurt,fruit salad,juice,coffee/tea. Please tell them it is for the Maritime Machine Knitters Seminar in order to get this special rate.


WHEN
Friday, September 28th,2018, Registration 6:00p.m. and Saturday, September 29th,2018. Late Registration 8:15a.m. - 8:30a.m.


COST
The cost for the seminar is $75.00 until August 15th,2015, after August  15th, 2015 registration cost will be$80.00. Full time student registration cost is $40.00. Registration fee includes refreshments on Friday evening and refreshments and buffet lunch on Saturday.


DEMONSTRATIONS<
We are pleased to say our SPECIAL GUEST demonstrator will be Diana Sullivan ,from Austin,Texas.  You can be sure she will have many new techniques and interesting creations to show us. You can check out her videos on You tube.


SHOW & TELL
All participants in the seminar are invited to be part of this. If you have a knitted creation you would like to share with others then please  bring this along, put information on a recipe card (Info – i.e. Name of Knitter, machine knitted on, yarn used, original pattern, adapted pattern or pattern from a book.) These items will be shown on Friday evening and will be on display throughout the seminar. There will be prizes!!


REGISTRATION FORM
Download and complete this form and send with your cheque or money order payable to:
ISLAND KNITTERS CLUB
Clare Doyle,
1052 China Point Road,
Vernon Post Office, R.R. #3,
P.E.I.
C0A 2E0

Monday, August 6, 2018

Diagram for the Tuck Lace Afghan

Here's the diagram for the tuck lace in the Tuck Lace Afghan, Stitch World #125 for the Brother 270.

If you need to punch a card, you would repeat this design3 times for 24 stitches, with shaded squares being punched and white squares unpunched.

The hooks at the bottom indicate needles in work.  The O symbols indicate needles out of work, in A position.

The dark squares knit.  The white squares tuck if they at a needle in work.

Sunday, August 5, 2018

August's Video is a Nice Tuck Lace Afghan

I whipped out this afghan a while back (it really is fast) using 2 strands of 2/12 Tamm yarn.  I have a lot of Tamm, and am quite happy with how it works, not just on my standard gauge machine, but on my bulky and mid-gauge machines.  For the bigger gauge machines, I use  more than one strand.

My afghan has a wide, sturdy hem that gives it a much tidier finish than an edging or a fringe would, at least for this yarn and this stitch.

If you have a DK weight yarn or even a worsted weight yarn, you could make this afghan.  Mine took about 3 pounds of yarn total, about half of that the lighter rose and half the darker burgundy. 

The afghan also has latched joins and latched sides.  They're easy to do, have an interesting look, and also go quickly.


Sunday, June 3, 2018

New Video for June - Smiles and Frowns with Waste 1x1 Rib

Oh, you're got to look at this one!  Wouldn't you like to be able to put a beautiful "smiles and frowns" cast-off on knit one, purl one ribbing without having the circular waste yarn rows at the end?  This cast-off looks just like the cast-on, and it's VERY professional-looking, as well as stretchy and sturdy. 

This is exactly the situation you find yourself in if you make circular sock machine socks toes first and end on ribbing, then crank on a few rows of waste yarn.  I usually do mine that way, and I've tried every bind off and crochet stitch I could possibly conceive.  Victory at last - this is such a stretchy bind-off that it's perfect for sock cuffs which must stretch and bounce back.


Please forgive me for being so quiet lately!  I'd blog more if I weren't so unbelievable busy.  I recently returned from Pacifically Passap, Pat Groves' wonderful knitting seminar in Oregon.  I taught, hung out with some of my favorite knitters, and met some wonderful knitters for the first time.  John and I had a marvelous time in and around Portland, as well, enjoying both the city and the amazing scenery in the Columbia River area. 

Wednesday, May 16, 2018

Another Great Post from Ozlorna

This wonderful article is about the 20-stitch multiple transfer tools from the Netherlands.

One of my friends tried these and had difficulties with them not being smooth.  Ozlorna, being the ingenious person she is, has tacked the problem.  Have a read!

http://ozlorna.blogspot.com/2018/04/3d-garter-bar-for-my-brother-7mm-kx350.html