
Image via Freepik
Beyond the Scroll: Seven Surprisingly Fun Skills You
Can Learn Online or Out in the Wild
In a world constantly nudging you to scroll just a
little longer, it’s easy to forget how good it feels to actually do something—especially something new.
We all get the itch. Maybe it starts as a passing thought after bingeing a
cooking show, or maybe it comes from watching a friend turn their weekend hobby
into something real. But the urge is there: to learn, to create, to connect. What’s
beautiful now is that you don’t have to choose between solo exploration and
social interaction—some of the most fulfilling hobbies let you do both. You can
learn the ropes in your pajamas online, then step out and meet real people who
are into the same thing. Let’s dive into seven under-the-radar (but totally
addictive) skills you can pick up from your couch or your community.
Turning Silence
into Sound
There’s something wildly vulnerable and rewarding about learning to play music
as an adult. You might start online, fumbling through beginner ukulele
tutorials or downloading a piano app that gamifies the basics. But sooner or
later, you’ll crave that live feedback loop—joining a local jam session or taking a group class becomes the natural next
step. And when you hit that first clean chord in front of people, it’s
electric.
Cracking the
Code: Finding Flow in Computer Science
Learning computer science can feel like unlocking a new way of thinking—it
sharpens how you approach problems, patterns, and even everyday decisions.
Whether you're dabbling in coding through online tutorials or building your
first app, the learning curve is real but incredibly rewarding. For those looking
to take their skills further, earning a degree can offer structure, deeper
knowledge, and access to tools and communities you might not find on your own.
Choosing an online computer science degree makes it easier
to balance work responsibilities while you explore everything from algorithms
to AI without putting your life on pause.
The Dance Floor
Is Everywhere Now
Dance used to feel like something you either learned as a kid or avoided at
weddings. That’s over. TikTok may have made choreography bite-sized, but
there’s a whole universe of dance styles you can dip into online—from beginner
hip-hop to salsa footwork to K-pop routines that sneak in a workout. Then, when you’ve mustered the courage (and muscle memory),
walking into a local dance studio or Latin night becomes less intimidating and
more of a celebration.
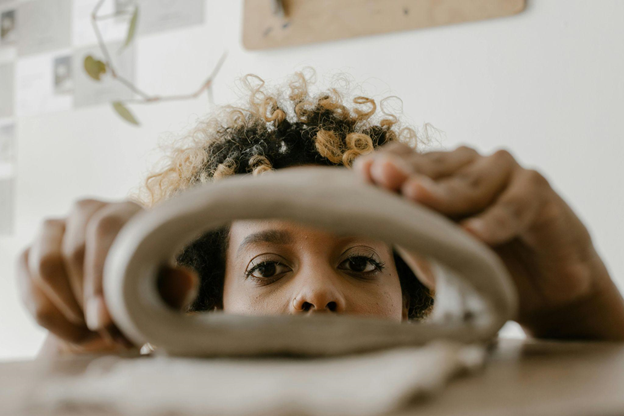
Pottery Isn’t
Just for Ghost Scenes Anymore
There’s a quiet therapy in shaping clay. It’s tactile, a little messy, and
weirdly meditative. While you can start with YouTube demos or even mail-order
kits, pottery almost insists that you step into a studio eventually—to fire
your pieces, yes, but also to vibe with others hunched over wheels or
hand-building mugs that lean a little to the left. You’ll leave each session
with something imperfect but deeply yours.
The Art of
Brewing the Perfect Cup
Coffee and tea aren’t just drinks—they’re rituals. If you’ve ever watched a
slow-pour video on Instagram and thought, “I could do that,” you absolutely
can. Online classes can walk you through everything from grind size to water temperature,
and pretty soon you’ll be geeking out over bloom times like a pro. What’s cool
is that cafes and local roasters often host tastings or workshops, where your
solo obsession can suddenly become a communal ritual.
Making Words
Work for You
Creative writing isn’t just for tortured novelists or people with MFA degrees.
It’s one of the most accessible, soul-stirring skills you can pick up—often for
free. Sites like Coursera or Substack can get you going, and before long, you
might find yourself joining a writing group at your library or sharing pieces
at an open mic. There’s power in giving voice to your experiences, and even
more in hearing someone say, “I felt that too.”
Knots, Needles,
and Nerdy Delight
Fiber arts are having a moment, and for good reason—they hit that sweet spot
between focus and calm. Whether you’re picking up crochet, embroidery, macramé,
or knitting, you’ll find a rabbit hole of charming tutorials and pattern swaps
online. But the real magic? Local stitch-and-bitch circles, yarn cafes, or
crafting nights at your nearest bookstore. They’re full of people who
understand the high of finally nailing that tricky stitch—and who’ll
celebrate your lopsided scarf like it’s runway-ready.
Photography for
the Rest of Us
You don’t need a fancy DSLR or a five-hour Lightroom course to make photography
your thing. Start with your phone. Learn how to frame a shot, find light, and
tell stories through photos—plenty of photographers share killer tips online
for free. Then take it offline: join a local photo walk, enter a community
contest, or offer to snap portraits at a friend’s event.
Suddenly you’re not just taking pictures—you’re seeing your world differently.
Here’s the secret no one tells you: you don’t have to become an expert. You just have to start. The point isn’t mastery—it’s motion. Finding a new skill or hobby isn’t about productivity or self-improvement, at least not primarily. It’s about curiosity, presence, and maybe even joy. You learn a few chords, you brew a better cup, you mess up a pot and laugh with strangers. That’s it. That’s the stuff. The best part? Whether you’re starting from your bedroom or stepping into a studio, you’re not alone. And that, more than anything, makes the learning stick.
Discover the art of machine knitting with Diana’s expert
tutorials and innovative patterns at Diana Natters On — your
go-to resource for knitting inspiration and techniques!


.tif)
