Showing posts sorted by date for query yarn weight. Sort by relevance Show all posts

Sunday, December 25, 2022

Merry Christmas - And an Oldie But Goodie Freebie Project to Knit

 Hello, dear fellow knitters, and Merry, Merry Christmas!  

Over the years, since I've been teaching machine knitting online, I've got to know quite a few of you.  You are very important to me. 

I do hope you are having an absolutely beautiful holiday and that your heart is filled with the hope, love and peace Jesus provides. If for some reason you're experiencing difficulty, discouragement, or illness, please email me so I could pray for you?   (Email me by clicking on the envelope icon down the left side of this blog).  

We knitters need to stick together and encourage one another.

I'd like to give you a Christmas present, and I wondered what I could do for everyone.  Why not repost a cool old pattern that's a little tricky to find?  So, here's an an oldie but goodie machine knitting pattern for a sew as you go gym-length sock.  Knitters get a lot of requests for socks, and here's a pattern you can make on the simples single bed machine.  It's a great opportunity to tune up your sew as you go skills!

First the old video (sorry, made with the older technology) for the technique:


And here's a written pattern for a womens' medium gym sock:

Sew-As-You-Go Single Bed Sock

By Diana Sullivan

© Diana L. Sullivan All Rights Reserved

This pattern makes a low-rise gym sock, which barely shows under an athletic shoe. Instructions are for a women’s medium.

Click here for the instructional video

Yarn: Use a good quality sock weight yarn.

Gauge: 8 stitches and 9.25 rows to an inch, or 34 sts and 38 rows to 4” (10 centimenters) I was using tension 6.2 on my machine to get the gauge, but you need the tension setting that gives you the gauge on your machine with your yarn.

Machine: Any standard gauge Japanese flat bed knitting machine, no ribber required

Mock Rib Hem

Tension 3 tensions tighter than garment tension.

Arrange needles for a 2 x 1 mock ribbing arrangement from needle #L16 through needle #R16. That is, put two needles into working position, and leave one back, across those needles. Knit a few rows of waste yarn and a row with ravel cord.

Change to main yarn and knit 20 rows. Pick up the hem, filling in the empty needles. All the needles are in work now, 32 sts.

Back of Ankle

Turn to the regular tension, which gives the gauge for the sock. Knit 20 rows.

Back of Heel

Short row shaping – decrease one stitch at the beginning of every row until only 11 stitches remain in work. Wrapping to prevent a hole (see the video), increase 1 stitch every row until all stitches are in work again.

Bottom of Foot

Knit 40 rows.

Toe

Short row shaping, just like heel. Decrease one stitch at the beginning of every row until only 11 stitches remain in work. Wrapping to prevent a hole (see the video), increase 1 stitch every row until all stitches are in work again.

Top of Foot and Front of Ankle

Knit, doing sew-as-you-go pickup of 1 loop on side opposite carriage every row. Watch the video to see exactly how to do the sew-as-you-go join. Knit until you are all the way back to the mock rib hem.

Final Mock Rib Hem (Ankle front)

Following the video, sew off every third stitch onto a piece of waste yarn. Move those unused needles out of work. Turn the tension to the tighter tension for the mock rib hem. Knit 20 rows. Pick up the stitches from the waste yarn and put them on the out of work needles. Pick up the remaining stitches. Cut the yarn and sew the hem off as shown in the video, OR cast off.


Friday, August 6, 2021

Yarn Weights - Guest Blog from Margit Tritt

 Margit is a Silver Reed (Studio) knitting machine dealer in Colorado.  Her business is www.pacaknits.com.  

I greatly appreciate active dealers like Margit who are knowledgeable and provide services for machine knitters.  Margit has classes and parts.  Margit is now the Silver Needles Cone Winder dealer.  I have one of these wonderful machines, which I keep out and use regularly.

Margit recently wrote a useful essay about yarn weights which follows.  I have a previous essay about yarn weights here:  https://diananatters.blogspot.com/search?q=yarn+weight  If you want to have an enjoyable, productive experience in machine knitting, choosing the right yarn is critical!


Yarn Weight Categories 

Compiled by Margit Tritt, www.PacaKnits.com

Updated January 2020 

ARGH! Everyone seems to call yarn by different names using a confusing set of units! Hand knit and crochet, EU (Europe) vs. US, machine knit, weaving WPP (wraps per inch), YPP (yards per pound), nm (meters per 1 gram – metric yarns number), … depending on the system you’re using, 16/2 = 2/24 = 6720 yds / lb (cotton count vs worsted count) 

BTW, the basic conversions I know off the top of my head are: • 2.54 cm = 1 inch • 453.6 grams = 1 pound • 1 kilogram (kg) = 2.2 pounds 

Thank goodness for Google (and other search engines) and built in conversion computations. In the “old” days when I got my bachelor’s degree in mathematics, we used the CRC Standard Mathematical Tables and Formulae. I don’t remember what version I used but much of this info is available on calculators now. 

What works with what machine? I’ve combined info from various web sites to provide basic guidelines. Please go to the sources listed below and do your own research. When all else fails – SWATCH!! (I’m kidding – always always always make a gauge swatch for a knit item that requires specific dimensions.) Note: Silver Reed manuals have photos to correlate actual sizes of yarn to stitch dial settings and of course, the different gauge machines will support different sizes of yarn. Yet more sets of numbers that have no relationship to the table below! 

 I did not include #6 (Super Bulky) and #7 (Jumbo) yarns as these generally cannot be used as main yarns in any machine. However, they may work for weaving so keep your yarn stash! 

3/11 = Sport Weight 

4/8 = Worsted Weight 

2/11and 3/15 = Fingering Weight 

2/20 and 2/24 = Fine weight 

2 strands of 2/24 together = Fingering Weight. 


Here are some pertinent links:

Craft Yarn Council Standard Weight System

Swicofil Yarn Conversion

Wikipedia Units of Textile Measurement


One nm equals 1,000 meters of yarn per kilogram (1,000 m/kg). This equals 50 meters per 50 grams. A 1/8 nm yarn (usually just called 1/8, without the nm) tells you that the yarn has been spun 8 times longer than the standard and is therefore finer. You will get 8,000 meters per kilogram if your yarn is a 1/8. The first number in the name, or the 1 in 1/8 indicates the number of plies in the yarn. A 1/8 yarn has one ply, a 2/8 yarn has 2 plies, etc. A 2/8 yarn indicates the yarn was spun to 8,000 meters per kilogram, but then plied into a two-ply yarn. The finished yarn will therefore measure 4,000 meters per kilogram. 

A 3/8 yarn will have 2,666 meters/kilogram, or 8000 divided by 3. 

How does the general numeric system compare to the CYCA chart? From thick to thin: 

  • 4/8 yarn yields 1,120 yards per pound and is closest to what hand knitters consider a DK weight yarn or #4. 
  • 3/8 yarn yields 1,490 yards per pound, or sport weight yarn. Similar to a DK weight, but slightly thinner or #3. 
  • 2/8 yarn yields 2,240 yards per pound, for a fingering weight yarn or #2. 
  • 2/18 yarn yields 5,040 yards per pound and is considered laceweight or #0 - #1. 
  • 2/20 yarn yields 5,600 yards per pound and is also considered laceweight. The difference between 2/18 and 2/20 is slight for a hand knitter, akin to the difference between 4/8 and 3/8. 
  • 2/24 yarn yields 5,960 yards per pound, and again, is considered laceweight.  

Monday, March 2, 2020

When An Awfully Stubborn Knitter Meets Awful Yarn

This mystery yarn was given to me a few years ago.  I love the color.  I don't think it shows up in the photo, but it's lavender with little heathery bits of pink.

This big mess is my multiple tries with the yarn.  It was on a cone, so I didn't rewind it.  It was even bagged with a good name brand on it, but as soon as I looked closely at it, I didn't think it was that brand.  I think it was in the wrong bag.

It turned out that it has knots, thin spots, thick chunks, and weak spots. 


I've been working on a nice pattern book idea, and tried two of the patterns with this stuff, thinking most of us have some thin mystery yarn, and using the ribber I could get nice width, pretty patterns, and no edgings needed.  However, when you use the ribber, the work forms between the beds and you don't see trouble right away.


The ball on top of the pile was from unraveling  150-200 rows after finding two big holes in the work.  The yarn had broken.  I rewound that into smaller balls.  I wondered if my stitch design that put too much strain on the yarn - too much weight, too many tucks, etc.  For at least the first three tries, I was sure I was the problem.  For anyone who hasn't seen me at seminar and maybe thinks my knitting goes smoothly, well, that isn't always the case!

The other messy samples are multiple tries that ended with trouble.  It wasn't the machine, or the ribber comb, or the tension, or the pattern I chose.  It was the yarn, a thick spot, breaking, or having a big fat knot.

One of the chunks didn't knit off, it piled on a needle, and now there's a bent needle in my trash can, too.  I didn't see it, hear it, or feel it soon enough.  At that point, I knew there might be breaks but I didn't expect thick sections.

I'm so DONE with that yarn!  Pardon my bad grammar.  This was certainly frustrating enough to mess with my grammar and my decorum, as well.

There is one option: I could carefully rewind the yarn into little balls, feeling it as I go, and cut it every time I find a flaw.  I've done that before, but this particular cone would turn into 20 little balls.
Nope. I am not rewinding it.

I am not giving it to anyone for "practice yarn" or "waste yarn."  Sounds like a way to annoy a friend!  Goodbye, pretty but evil yarn.

Friday, February 21, 2020

Yarn Scale

Mary Anne Oger has a photo of the small scale she uses in her knitting room.

I do the same thing.  I actually have an old Weight Watchers kitchen scale in the knitting room.  It has both grams and ounces. 

Off topic:  I have another, newer food scale in my kitchen, I still weigh and measure my food, I'm still slim, and no, I'm not a Weight Watchers customer.  I had a previous post about slimming down a few years ago.

 I weigh partial cones, allowing a whole ounce for the weight of the cardboard cone.  I weigh partial and unlabeled skeins, as well. 

I often weigh finished projects to see exactly how much yarn I used.  By weighing a finished project and checking the yardage on the label. I can figure the yardage used in the project, which is very useful for working out whether I have enough yarn to make another.


Wednesday, February 19, 2020

Shopping Game at Harbor Freight

My husband loves to go to Harbor Freight, which is a tool shop with a lot of low-price specials.  It's actually an interesting store.

I entertained myself on our last trip by looking for things that machine knitters want or need.  I found a bunch, too!  I didn't buy all this stuff, since I already had most of these items in my knitting area, but my machine-knitting scavenger hunt kept me occupied. 

I admit it - I like bargains, and I bet you do, too.  I didn't clean up or crop these photos - I wanted you to see the prices and displays.  The prices are low, and we also had a coupon for some free items and a percentage off on the total purchase.

First of all, lights.  They have lots of different flash lights, shop lights, and work lights.  I use a big LED work light in my knitting room as well as a halogen lamp in my knitting room.  I also keep flashlights handy.  On the last trip to Harbor Freight, I picked up one of these pocket-sized LED work lights on special.  It is also a flashlight and has a little hook.  I've already used it - I hung it up near my lap as I was binding off some ribbing where the waste yarn had unraveled.  It is surprisingly bright.

I noticed at a knitting seminar a while back that a cute little flashlight was one of the most popular door prizes.

I didn't photograph screwdrivers, but Harbor Freight has lots of them, including the small cheapo ones that have interchangeable bits.  You might want one of those if you travel with a knitting machine.  Knitting machines have both standard and cross-point screws. 

I keep a big standard screwdriver, small and medium cross-point screwdrivers, and a pair of needle-nose pliers in my knitting room.  These little tools are mine.  I don't raid John's tools.  (BTW, I've had my own small toolbox in the kitchen for most of our marriage.  It was a gift from John that I thought I wouldn't use much, but I actually use it very frequently).

I also didn't photograph "grabbers," you know those gadgets for old folks who need to reach things up high?  I keep one of those in my knitting room!  It's great for getting things off high shelves, but its best use is moving cones of yarn behind my machine or picking up dropped tools.  It's saved me from lots of crawling under machines.


This next item has been mentioned a number of times on this blog and at seminars - we use it to unstick carriage buttons!  For instance, the MC/thread lace buttons get stuck together in the center of Brother carriages quite frequently.  You buy a bottle of penetrating oil like this PB Blaster brand (John really likes Kroil, but you have to get that one online).  You spray it, using one of those spray straws, as far into the mechanism as you can get it.  Then you set the carriage on your kitchen counter and every time you notice it, you punch the buttons.  It can take two or three days, but you almost always can get the buttons working again.

If you can't fix it this way, the next step is soaking the carriage.  However, we've seldom had to soak carriages for this problem alone.  Note on prevention:  Whenever you finish a project, oil your machine.  Move all the buttons and levers.  Move all the buttons and levers on your other machines, while you're thinking about it, and it will eliminate this problem.

Ah, dental picks.  They have an assortment of different picks, and I like them more for circular sock knitting than for my regular knitting machine, but it's nice to see them at Harbor Freight.
t

In another place in the store I found these other picks with nifty little handles.  I'd rather have the chunky handle - wouldn't you? 

Not only do I like to have dental picks in my knitting room, I also like to have tweezers.  I got used to using these long, assorted tweezers when I fixed a few laptops at work. 


Okay, the next one is a joke!  I have been teased because I am such a clothespin user as I machine knit.  I didn't see any clothespins at Harbor Freight, although they had clothesline.  What I did see were these crazy clamps.  Sure, they had little ones that would work for a yarn weight, the way I use a clothespin, but this one is ridiculous, so I took a picture.

I don't really have an MK use for this thing.


This is a telescoping magnetic grabber.  These are super to have near your sewing machine and your circular sock machine.  I drop those itty bitty sock machine needles quite often. 

Another item I keep near my CSM is a telescoping "dental" mirror.  Sometimes it's nice to see under and inside the CSM.  Harbor Freight carries those, too.


Saturday, February 8, 2020

A Dozen Slippers - Made and Delivered

I was so impressed with Alexandra's accomplishment - 100 pairs of slippers! 

All I needed to make recently was 12 pairs of women's medium slippers, but quickly, for a friend's project.  I told myself to use yarn I already had - no trips to the stores!

I chose the Quick and Cozy English Rib Slipper pattern from Footnotes, which is my fastest slipper pattern.  That pattern is so stretchy that a women's medium will fit just about any lady!  Besides, I was in a hurry, and I could zoom through those.

What yarn to use?  This slipper can be made on a bulky machine, or a standard gauge machine, but requires a ribber.  I could use worsted weight yarn or sock weight.  Even if I chose a yarn that wouldn't make gauge, I knew that with a pinch of math, I could recalculate the stitches and rows and still make it on either of those machines, which are standing ready with ribbers attached.

Here's the video from Footnotes, which I've never shared on YouTube before.  It shows how to make the slipper using sock yarn and a standard gauge machine. 

I wanted them to be fairly thick and sturdy, so they'll last a while, but also reasonably soft.   I wanted them to be a bit feminine.  I kept picking yarn up and then putting it back. 

Eventually, I found some pink sparkly yarn in a drawer.  (There is 'way too much yarn around here.)  This yarn is rather chunky and stiff for a sweater, with enough cotton that it isn't stretchy, yet I knew it would stretch fine knitted in this ribbed pattern.  The yarn was from Newton's Knits a few years ago.  I had been wondering, every time I looked at it, what it wanted to become!

The pattern calls for 4 ounces of yarn.  I round up when I write patterns that only specify a thickness group, because your yarn might have less yards than mine, or you might make small changes.  In this pink yarn, the bulky medium took about 3-1/2 ounces for a pair.   These knit up in 10 minutes or less per slipper.  The sewing takes me another 10-15 minutes, though!  They need a seam at the back of the heel and the top of the foot.  Hide two ends, and you're done. 

Knitting 24 slippers took less than a workday, but I did it in several sessions.  Sewing them up took a few days of indulgent TV time (lately, re-watching "Call the Midwife" on Netflix when I'm doing finishing).

I hadn't made this pattern in years.  I watched my own video to refresh my memory, and it was a good thing, because the seaming method, which I'd forgotten using, was easy and worked great.  You might like to apply these methods to a project like like a hat, that needs gathered at one end.

Once they were assembled, for safety they needed an anti-slip substance on the bottom.  John keeps silicone seal in the garage, where he uses it often, and had a new tube on hand. 

I also stuffed them temporarily, to stretch them open a bit so I wouldn't glue them shut with the silicone seal.  That turned out to not be a problem, though; I ended up putting seal on just the ridges.

Some of the silicone seal I used in the past was runny, therefore, very easy to put on - you just scribble using the cone-shaped applicator.  However,  this one was thick and pasty.  I put nalgene gloves on, squished a blob on my finger and stroked it on each rib in the ball-of-the-foot and heel areas on the bottom of the slippers.  Since my sealant was so thick, it certainly didn't go through and catch the stuffing, which I removed before taking this picture.

The photo shows slippers drying on a trash bag.  The silicone seal gets everywhere, even though I think I'm being careful.  The loose ties you see are just to keep the pairs together.

I think they look like pink, sparkly corn cobs!  They are bigger than they look, because the ribs open up when you slip them on your foot. 

Here are some pictures of them finished.  The sparkle is subtle and doesn't show up in the pix.  Note that is a seam up the top of the foot, blending in and looking like the rest of the ribs.

Here's a shameless plug for my Footnotes book and DVD.  This contains a bunch of other slippers in it, as well, as well as some sew-as-you-go socks.  Everything has 12 sizes and it comes with a very detailed technique DVD.  The slippers are for standard, mid-gauge and bulky flatbed knitting machines. 

I've sold more Footnotes than usual lately.  Usually when that happens, someone has made something very nice using one of the patterns and shared it on the internet.  I don't know what it is - would someone tell me in the comments? 


Thursday, October 31, 2019

Now Available - Shawl Collection for Machine Knitters

Whew!  My new book is finally available to purchase at www.dianaknits.com.  The DVDs arrived from the duplicator the other day, and I can finally say it's ready to go.

So - what's here?  The book contains 9 shawl patterns, a mix of skill levels, techniques, and machine gauges, and then there's a 2-DVD set.  It simply took hours and hours of footage to teach all the different shawls. I was very pleased when I tested the  new DVDs the other day - super crisp HD pictures on our big-screen TV.  The book and DVD set is $25.  US postage is $3 and international shipping is more.

Rundown on the shawls:

The Self Fringing Shawl is a super beginner project.  I wrote the pattern for the mid-gauge, and I used a number of different yarns for it.  A good starting place would be a single package of Shawl in a Ball.

If you've been unhappy with self-fringing techniques in the past, you might have run into the problem that the knitting along the self-fringe unravels into a mess.  I have a "locked" fringe technique, and that problem is totally eliminated.

The two pictured are Shawl in a Cake, and take one package.  Another favorite samples was made with an end of sport weight slubby white yarn and a pile of small balls of leftover self-striping sock yarn.  It's a super scrappy project.  Forget hiding ends for all those color changes - they're fringe.

Miters and Lace was knitted on my bulky with the ribber.  I took advantage of U-shaped knitting technique to make a matched mitered triangle shawl out of "cakes" yarn.

This has hand-tooled scalloped lace edge with a great-looking mitered point for the center point of the shawl.  Details matter!

The Peacock Shawl is done on a bulky machine, no patterning or ribber required.  This one is a semi-circle, short-rowed triangles and a hand-tooled lace.  Make your lace tooling super easy by using a 7-stitch transfer tool.

The Peacock Shawl has an interesting straight edge finish - the extra-wide I-cord edging, to provide a sturdy edge for the most-handled part of the shawl.

I tried several yarns for this one.  The blue/green colorway shown is Shawl in a Cake.  This is big - you need two packs.  The oranges colorway is Caron Latte Cakes.  That particular shawl is absolutely the comfiest, warmest shawl in my huge box of samples.  Caron had discontinued this yarn, but it's back now, and I've seen it at Michael's in new colorways.

Color-changing yarn or "cakes" yarn is fun for this shawl,,because you get a starburst effect with the colors.

Half Circle Shawl with Leaf Edging is made on the standard gauge Brother with a Stitch World lace for the outer edge.  I've taught the Stitch World method of scalloped edgings before, but if you wanted, you could use any of the "Enchanted Edgings" on this one, instead.  The edging was knitted afterwards and put on with sew-as-you-go technique for a nearly undetectable seam.  The starburst design is lace eyelets this time.


The Mirror Image Lace Triangular Shawl is a pattern I've had for years, but didn't sell, because it's a little more advanced and has very unusual techniques, particularly the mirror image lace. It's in this book, though, because I included all the video necessary to see exactly what needs done to get the effect
The lace matches in the middle of the triangle, and the shawl also featured a fancy edge.  This is made on a standard gauge Brother electronic using a Stitch World pattern.

The Bias Lace Triangle Shawlette was my approach to getting stripes that slide along the triangle without using the garter bar.  I used bias lace on the standard gauge machine with a lace carriage along with self-striping sock yarn.  Both sides are pretty; I don't know which side should be "public."

These bias lace projects are easy, and I have two in the book.  The second on is a chevron shape, Chevron Bias Lace Shawl, a nice, big shawl made of two trapezoids of bias lace.  Halfway through, change direction and make the lace bias the other direction!

The Drop Lace Stole is a bulky project that requires a ribber.  Drop Lace was a featured stitch for the Brother 260/270 machine ribbers.  It's pretty and it's easy, but I haven't used the technique all that often.  Try something fuzzy and warm for this shawl, which is a big, wrap-me-up stole. I first made it for my tall daughter-in-law, who liked it because it is generous-sized.

Finally, the book has a poncho, which is sized for adults as well as children.  People are wearing ponchos again, and these look so cute on little girls and stay on.

That's the Slider Lace Poncho, knitted on the mid-gauge with a very simple hand-tooled pattern, shown in the closeup photo.

This is just two rectangles, if you're a beginner, and it has two different but simples edgings to learn for the neckline and the bottom edge.  I also teach how to put the two seams in on the machine.  Those seams join a side edge to a top edge, and a good way to make them look great is to put them together on the machine.


Wednesday, October 30, 2019

Finished the Baby Velvet Adult-Sized Afghan

Wow, it's finally finished!  This was a LOT of short-rowed shells to knit.  I've been knitting on it a little almost every day for a couple weeks.

I love doing these.  This was the child's pattern with a different yarn an a looser tension, only 12 stitches).

It's very, very soft.  It's pet-able!  Chenille is sure quirky, though, as you'll see as I describe finishing, below.

I used the same edging I used on several of the shawls - an extra wide I-cord made by latching the inside ladder by hand every few rows.  I just love this edge, and it really gave a needed reinforcement to this afghan.  The chenille is a somewhat floppy, and the sturdy double edge helped.  That edge eliminates all edge curl and looks good on both sides.  It went on tighter, though, than I expected.  I had to turn up the tension to #10 (the afghan was knitted on T9), and I had to use weight and be sure to pick up every side loop along the sides (just the loops, not the knots - the idea is to get every other row) and every stitch on the top.  I didn't have a problem with it going on tight with the other yarns.

The afghan has a hem at the bottom, and the pattern says to put a hem at the top.  Because this was chenille I knew sewing a top hem would be a problem.  Chenille is hard to pull through with a needle, likely to break, and loses its fur being pulled through over and over.  Binding off the hem with the latch tool was going to make a lumpy line at the bottom of the hem.  Instead of using a top hem, I did this:

  • Made the final row of "finishing shells," which are shorter than the regular shells.  End that row of shells with one row of the same color over all the needles so there are no double loops from short-rowing to pick up.
  • Put on 6 rows of waste yarn with a contrasting color of worsted weight yarn.  
  • Do the I-cord edge, picking up one stitch from the top edge along the waste knitting each time.  Be sure to use the looser tension for this, T10.
That top edge is beautiful, straight, sturdy, and not lumpy at all.  The smaller pic is that top edge. 

The next photo is the detail of an inside corner at the bottom - it shows the hem which curves along the shells, gives you an idea what the purl side of the seashell stitch looks like, and also what the inside of the I-cord edge and bottom hem look like.  If you want warmth and to not snag fingers and toes, this pattern has no holes and no floats.  

I took a bunch of photos, walked away, and only then decided to steam the edgings only.  I wanted to stretch them a little, just gently, as the corners cupped a little.  I also wanted to make sure the curved bottom hem was flat.

I suppose that if you wanted a straight line at the bottom, you could start with one row of the shorter finishing shells, but I prefer the curves. 

I did not steam the seashells at all, just the edges.  The chenille made a flatter seashell than any other yarn I've tried, and I wanted texture.

Another warning about the chenille - yarn ends do not want to stay hidden!  I keep tucking them in and the tip ends keep working out.  Fortunately, I knitted almost every end in by e-wrapping six needles on the wrong side.  

Here's the afghan spread out on a bed for steaming.

That's a queen-sized bed, and you can see what a BIG afghan this is.  I wanted it big, and it turned out wider than the mid-gauge needle bed.  It's not very often you get an adult-size afghan with just one width of the knitting.


Tuesday, September 3, 2019

Working away on the shawl book

I've been working on a shawl book...forever.  I have a great time coming up with the ideas and the shawls, and then getting the rest of it done is where I bog down.  The filming, editing, writing, diagramming, proofreading...and this time, the photography has been difficult.  My shawls are big, and that's how I like them.  It makes them harder to photograph.  My husband finally helped me - we made a two-person job of it with me holding very bright lights for him.  (The more light, the more detail...)

Today, I thought I'd share more shawl pix.  This was an especially fun pattern for me to develop, with several little puzzles to solve.  I don't know if you will like this as much as I do, but this was my solution to matching striped yarn from "cakes."  Yup, I had the antiquated idea that I would really like the stripes to match and make a chevron.


This was a ribber project, using my bulky, and I got the marled look to the colors by mixing a cake of a sport weight self-striping yarn (Lion Brand) with an off white DK yarn.  I got the stripes, edge, and center lace by doing increases in U-shaped ribber knitting.

The edge is hand-tooled with the 7-stitch transfer tool.  The brown shawl edging is the one taught in the book.  It has my best bottom corner miter.  

I didn't add a top edging on any of these.  It's actually a built-in row of eyelets, and it looks fine.

You might like to see this in other yarns:

Did you know Caron Latte Cakes is available again?  I saw it at Michael's the other day.  I did this shawl in Latte Cakes.  It was an earlier shawl, and I went around the bottom corner with the edging by crowding the motifs.  Less effective than the miter, I think, but still very pretty.
I also did it in the regular Caron cakes.  This one has an earlier version of the bottom miter, and while it doesn't show well in the picture, in reality it is sort of straight across at the bottom.  I liked the little point better.


Monday, August 26, 2019

Making Knee Socks & Boot Socks

I'd been cranking some socks lately on my 100-year-old Legare 47.  I've been making "Diana's Favorite Sock," which I teach in my Happy Cranker book and DVD.

I simply do a sock a day.  I have always cranked socks as a way to leave the concerns of life behind.  I think it's an exercise in mindfulness - you really have to pay attention to what you're doing when you work up socks on an antique machine.  I count my rows manually, often out loud, saying a row number as my crank hits the bottom of its cycle.  Yup, I know we could install a row counter, but my old Legare is authentic - and primitive.  My mind focuses on the knitting steps, and pretty soon it's finished and beautiful.

I stop to admire whatever the yarn colorway looks like knitted into a sock.  Finding very pretty sock yarns is a little sweet treat for my travels in life.

I crank the socks in a "string," starting the next sock after some waste knitting.  After I finish a sock, I usually take off the sock in the bottom of the string and sew up one sock, as well.  I enjoy a little sewing.  I use a magnifying Ott light and I listen to a book or music.

John and I have been going out country dancing with another couple lately.  They really know what they're doing, but John and I are beginners.  We can barely two-step, and when he twirls me, sometimes I get away!  A local place has a free lesson on Friday nights, and we have a wonderful time.  We listen, we practice, and we laugh at ourselves.  

The other lady and I were talking recently about our feet.  I'd been shopping for cowboy boots that don't rub anywhere.

She told me that she fights calluses from years of dancing in cowboy boots.  She described how she likes a thick sock or even a "boot sock."

Hmmm.  My homemade socks are rather thick.  Depending on the yarn, some of them are amazingly soft.

Time to think about making some knee socks, and this is just the sort of machine knitting problem I love to work out.

I hadn't made knee socks since my years as a hockey mom sitting in super-cold ice rinks watching Steven goal-keep.  Back then, I used to make 54-stitch socks, but now I make ribbed 72-stitch socks, which I know will work better.

Pictured is my first attempt.  With just a little math, I succeeded in getting the length right and making a top that stays up.  I wanted 12" of length, unstretched, between the ankle and the top cuff, and then a shorter top cuff.

The pink speckled sock is my typical pattern, knitted in Lorna's Laces.  The green mix is some Yarn Paradise wool blend, was made exactly the same through the ankle (I start at the toe).  Then I took off the heel spring and knitted 90 rounds with the needles set up like the ankle.  After that, I put the heel spring back in work and switched to knit one, purl one ribbing for the sock cuff.  The cuff is just like the cuff on the anklet except that it's only 30 rounds.  I know the top cuff looks wider than the cuff on the pink socks, but that's two pink socks in the picture, stacked a little offset, but only one green sock.

The calf area is wide enough because taking off the heel spring makes bigger stitches.  I did NOT want to change my machine tension, which is adjusted just the way I want it for my shorter sock.

I wear a women's medium.  This pair of Lorna's Laces socks weight 76 grams.  The finished pair of knee socks weigh 104 grams.  Since sock yarns are put up in 50- and 100-gram balls, you might run a little short unless you buy an extra ball or you use another yarn for the heel and toe.

If Diana's Favorite Sock works for you, you might like to try this.  I'm about average height, and on some people, you might fold the upper cuff down once, but I need all the length.

Monday, August 5, 2019

Knitting Shawls

I've been quiet here lately, with quite a lot going on.

I retired at the end of the year, went back to work temporarily in March, took several trips, and finished up the circular sock machine book and video.

All the while, I was working on shawls.  I'm putting a nice shawl collection together for a new book and video.

Starting with something simple and quick, a self-fringed shawl in two shapes - a deep triangle and a long, slow triangle.  The secret to a great fringe is to "lock" it by reinforcing the last stitch before the fringe.

A couple photos:
This one is "Shawl in a Ball," and takes one ball.  I made several out of that yarn - it's so much fun to see what the colors will do.  This brown has metallic golden accents.


 This is Caron Latte Cakes, takes one ball, and surprised me.  I thought I would not like the way the color changes along the miter, but I do like it!  It makes the shawl much more interesting. Unfortunately, this yarn is discontinued.

The peach shawl is the deeper triangle, and it's huge.  I made it with some worsted weight pure mohair. 

Thursday, April 11, 2019

Something New - A Click-to-Buy Pattern: Diana's Simplified Entrelac Afghan - UPDATED POST


A friend, Leslie, is knitting my "Squared Away Simplified Entrelac Afghan Without Triangles," and she's put some information on social media about the project.

Leslie is actually on an RV trip and knitting away in a screened-in room with a view!  She's got a nifty little knitting studio to take on the road.  Leslie is a relatively new machine knitter and NOTHING STOPS HER.  She has made amazing things!

Here's a photo of my sample of the afghan.  This pattern is made on a bulky (9 mm) machine.  It uses the waste yarn method of doing Entrelac.  It requires worsted weight yarn.  Mine was made with four colors of Simply Soft.  You'll want a waste yarn on hand that is about the same thickness and contrasts in color to all the other colors.  This is a VERY fun scrappy afghan, if you want to use up all sorts of yarn!

This afghan starts in a corner and each diagonal row of blocks makes it a little bigger.  If you want a bigger afghan, keep adding on...and on...

If you are curious about the waste yarn method of doing Entrelac, I have two videos about it on YouTube, although they are more complicated because you have to make the triangles to begin.  Here's Part One and Part Two of the Entrelac Pillow.

Another thing that is interesting about this pattern is the "picture frame" edging.  It's a sturdy, doubled edging with mitered corners that is a good addition to your knowledge of techniques and finishes. 

2022 UPDATE:  I've added an additional edging to the pattern - my favorite edging for this!  Here's a photo.


This pattern is available, like all my books and patterns, at www.dianaknits.com.

The pattern is $7.50 plus tax.  It will be EMAILED to you as soon as I see the order.  I check orders daily.  

Monday, January 14, 2019

Working On My Knitting Studio

When our younger son left for college, I took over his bedroom and made a knitting room.  I foolishly thought all my knitting things would be in one room, but no, it's still all over the house. 

One of my first goals as a new retiree is to work on the knitting room and make it into a studio where I will really enjoy working.  It was probably in the worst possible condition after last year. I was overwhelmed at work, helping hire and train a new person, while very busy.  I also traveled and taught five seminars.  It was a wonderful year, but I didn't even unpack right away after some of the trips, and plenty of times, I just tossed bags and boxes into the knitting room.

I've been working on it diligently every day, and progress is happening!  I still have a big list of things to do, but here's what I've done so far.

For starters, I put together some wire cubbies for yarn.  These things are simply banged together using plastic connectors and a rubber-tipped hammer.  They're about one foot square, and I put them up along most of the longest wall in the room.  I started with 10 units long by 5 units tall, but John looked at it and suggested I go one unit higher, so now I have a 10x6 array.


I put bulky yarn in the left end of the rack, then mid-gauge yarn in the middle, and standard gauge yarn is on the right end.  I am embarrassed to say that this isn't all of my yarn. There are also two cone trees in my bedroom and some boxes downstairs.  Friends have generously given me yarn, and yarn has been included with machines I purchased.  It's time to do another yarn destash.  I went through a period where I gave away ridiculous amounts of yarn.  It even sold it for $1 a cone at a garage sale, and a customer told me I was crazy to sell it that cheap.  Well, my friends didn't want any more yarn, my house was groaning with it, and it had to go! 

It took me a while to learn that I don't love collecting yarn and machines.  It's knitting, designing knits, and teaching that gives me joy.

One task I didn't realize would be fun was putting yarn and tools into the rack.  I had forgotten some of the yarn I had.  Having pretty stuff on shelves at eye level makes me want to knit - big time! 

I had read about a financial challenge a while back that suggested one buy nothing in January.  Give the credit card a post-holiday rest and "shop" in your home, said the article.  I wasn't doing it deliberately, but this project had me shopping in my own home, and there were some great finds.

Most of the rest of these photos are things that have been in the room for ages; it's my attempt to organize the miscellany that comes with a passion for machine knitting.  Since I like to see how things can be stored, maybe you'll pick up an idea or two from my storage.


Starting at the door and going clockwise around the room, and with all the machines uncovered so you can see how I work, here's some my functional but messy room.  On the back of the door I have a clear shoe bag.  I've had this for ages and find it works great for keeping and being able to quickly find small KM items.

After you walk in, there's a small closet with bi-fold doors, and in front of that there's a little wooden stand with my electric cone winder and my jumbo yarn winder.  These need to be out all the time.  I very seldom use a small winder anymore!  I don't believe in knitting without rewinding the yarn.  There's a trash can right there, between the winders and the mid-gauge Studio 860.  It's so handy to have a trash can by each machine.

This is my Studio 860, which is electronic mid-gauge. There are cups and trays of tools next to it, and on the floor under the winders is a cardboard box filled with more mid-gauge tools.  The machines set up in this room are my workhorses.  Sometimes I teach on other machines, and those machines are put away elsewhere.

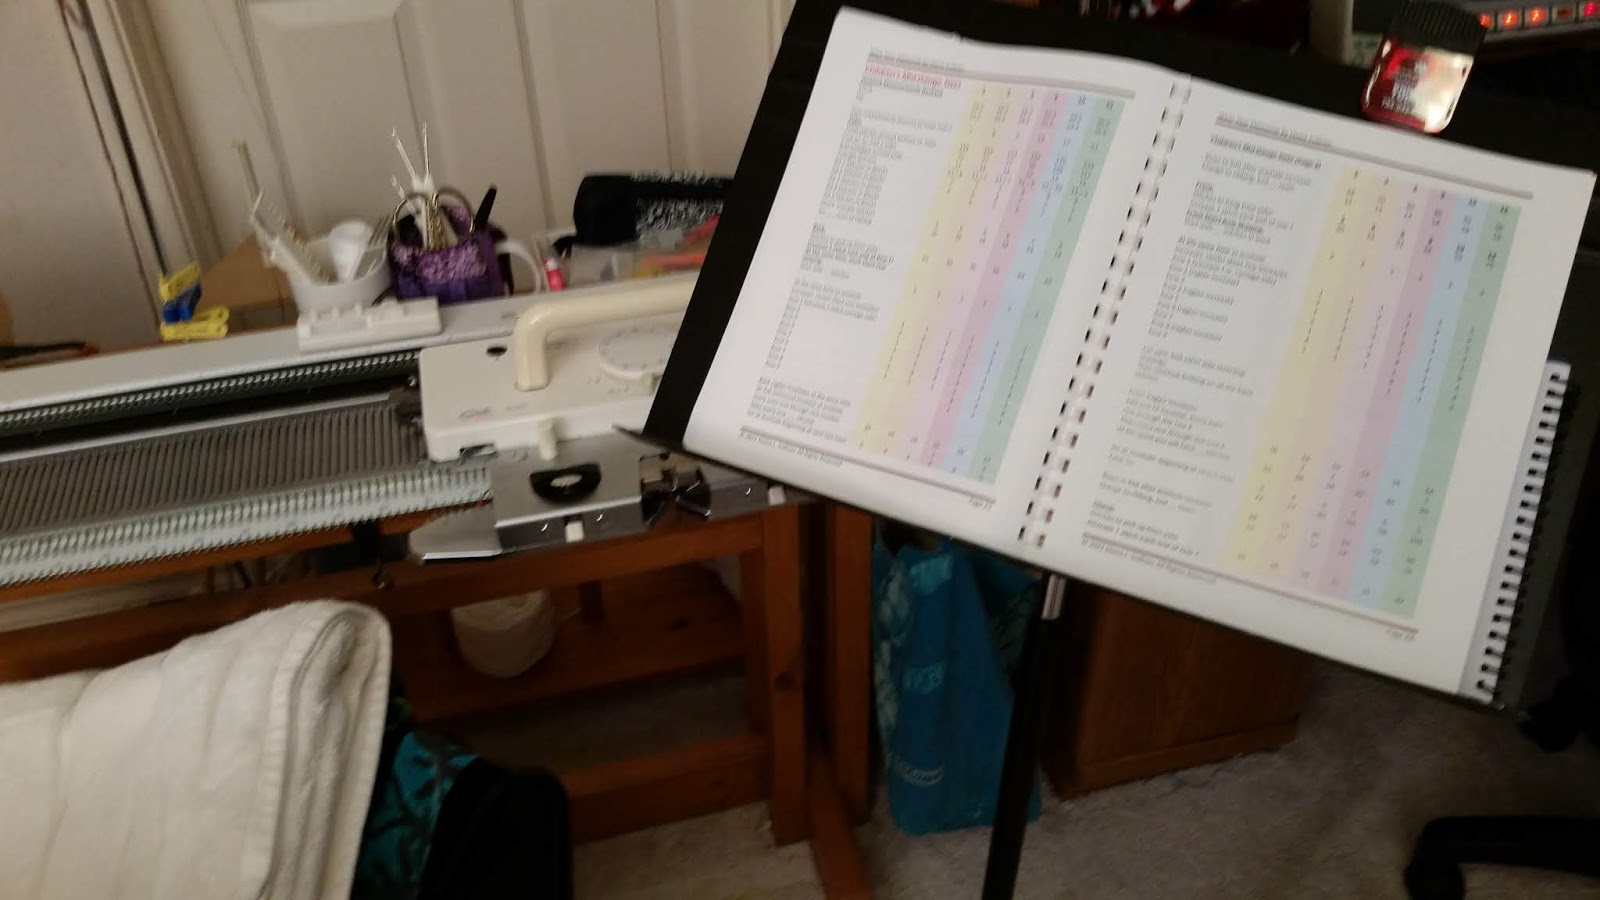
To the right of the mid-gauge is a sturdy music stand.  I've tried different ways of keeping the current pattern and notes handy, for instance, clipping them to the yarn mast, but this works best for me.  A music stand is one more thing cluttering the room, but it has lots of room.  In addition to my pattern, I have a spiral notebook, a pen, and another pattern or two I'm thinking about working up.

If I'm working and get an idea or think of a task I don't want to forget, I'll write it down right away with that handy paper and pen. 

I have a desk in the corner of the room.  This was my 35-year-old son's desk way back in high school.  Although it's old and battered, it is very functional for my needs. It holds my desktop computer and has lots of cubbies to stash things.  It also has a pull-out on the right side that provides extra surface area when I have a desk project.  I use this area to edit video, do bookkeeping, figure out patterns, and keep oddball things like DAK cables or my camera bag handy.

This is a special computer, configured for editing video, and I am very grateful for it, because it saves me hours of time on each video project.  I needed a special video card and lots of memory (we went with 36 GB) to handle high-definition video files.  I'm thrifty, but my husband has tried to teach me how important it is to have the right tool for the job.  This is a great example of how much having the right tool pays off.  It's due for a tune-up, a new hard drive and some software installation.

I have two rolling office chairs I move around the room.  I prefer the adjustable office chairs, because they're padded and I'll move them up and down just to change my body position as I work. 

Next, on the west wall, in front of the window, is my bulky machine (Brother 270) that you see so often in videos.  The day I took the photo was rainy and gray, but this bay window on the second floor looks out on the front lawn.  I enjoy having it open for the extra light.  It's not good for the machines to be exposed to sunlight, or dust.  I have colorful beach towels to keep them covered, but these pix are with everybody naked. 

This 270 is the machine I usually go to first if I'm playing around with swatches, trying out ideas and solving problems.  I purchased three sets of these cheap plastic drawers about 20 year ago, and they're still just fine.  This one is on wheels and filled with bulky tools.  I have ribber covers in place all the time unless I'm using the ribber.  I will also remove the ribber entirely if my project is on the main bed and I need better access.  This one's on a tilt stand, so I can easily go from main bed work to ribber work and back again.

And, here's the standard gauge machine, a Brother 965i.   It is mounted on a Brother motor drive.  I currently have an old color changer on it, because I was doing some Brioche ribbing.  I have wires and extension cords in a pile on the floor.  When we have lightning storms, I always crawl under here and unplug the power strip, which is used for this machine, the camera, the light, and the motor.  Almost everything in the room is on three power strips, which facilitates unplugging at the very first rumble.

With the extension cords, I can easily move the camera and work light all over the room.  The plastic drawers are filled with standard gauge tools and weights, and then on top is a carrying tote overflowing with ribber items. 

Here's the far right side of the room, with new yarn cubbies in the background and an oddball item in the foreground.  This is the light I use when I'm filming.  We discovered that the more light I have, the clearer I can get the video focus.  My husband gave me this garage work light stand.  It used to hold an incredibly bright halogen light, which was hot and an energy pig.  I'd get cooked working in here.  Despite the heat, I became utterly sold on having lots of light in the room as I knit.  When the LED work lights became common, we put one of those here instead.  It's just as bright and not as hot.  In addition to the ceiling light fixture, there's a halogen floor lamp by the Passap and a clip-on desk lamp. 

That's it for the north wall, and turning to the east wall, which is a short wall, I have my beloved Passap E6000.  In the corner left of the E6 is a large capped PVC pipe, which holds all my sponge bars, both new and worn out.  I prefer to purchase new sponge bars, but sometimes you need a size that you can't find, and you can put new foam rubber into an old sponge bar frame.

 There's also a cardboard box, which is filled with ribber combs.  I really don't have a smart way to store ribber combs.  I tried hanging them Command brand hooks, but they're a bit heavy for the hooks and tend to hit the floor.  Also, the combs are also unbalanced and hang crookedly if you use the weight holes.  I suppose the solution would be to drill a hole in a spot that balances, polish the hole's rough edges, and then pound nails in the wall, but I hate to drill a new hole in any of my combs.  Anybody got a great idea for storing ribber combs?